Plantar fasciitis can be stubborn and annoying to deal with. I’ve treated it effectively thousands of times and creates this comprehensive guide based on the research and those experiences to help you address both the symptoms and root causes to eliminate it for good.
Welcome to the third and final part of my three part series on plantar fasciitis – how to treat plantar fasciitis. If you missed part one – what is plantar fasciitis? – and or part two – four telltale signs of plantar fasciitis – you can find them here and here. I do highly recommend you read them sequentially to get a full purview on plantar fasciitis. The story arch if you will.
There’s a ton of purported treatments out there for plantar fasciitis and it can be confusing to figure out which ones do or don’t work, which ones you should prioritize, and so on. My goal is to provide you with an organized and efficient plan by focusing on treatments that are the most time and cost effective, “the biggest bang for your buck”. The general layout for each treatment is explaining why it helps and then what to do.
Lets get right into it:
1 – Mobility
When I say mobility, I’m speaking to both muscle flexibility and joint range of motion. In the case of plantar fasciitis, addressing calf flexibility, plantar fascia flexibility, and big toe extension are key.
Calf flexibility
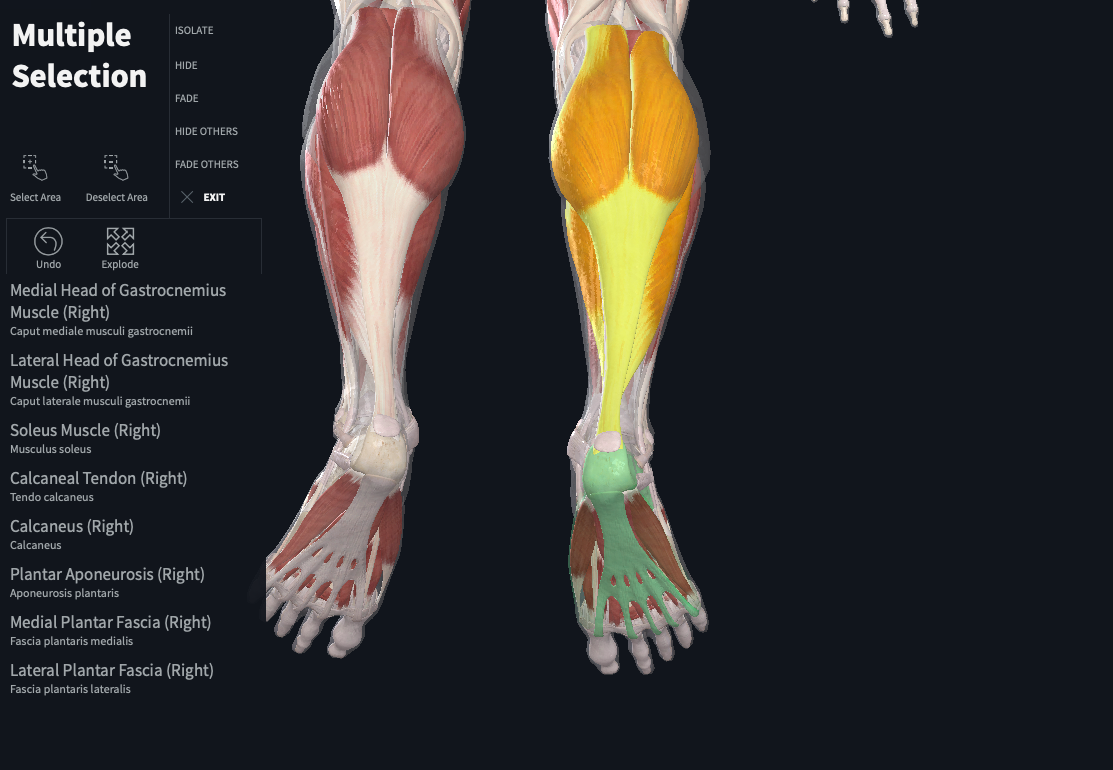
The calves consist of two different muscles – the lateral (outer) and medial (inner) heads of the gastrocnemius and the soleus that lays and fans out underneath them – and feed into your achilles tendon which feeds into the “plantar aponeurosis” which connects to the plantar fascia. If the calves are tight, it can affect that entire chain with added stress to the plantar fascia.
Additionally, when the calves are tight it can affect what I call “functional dorsiflexion” range of motion at the ankle. That’s when your foot is weight-bearing and your tibia (shinbone) has to travel over the top of it – like during walking, running, or jumping.
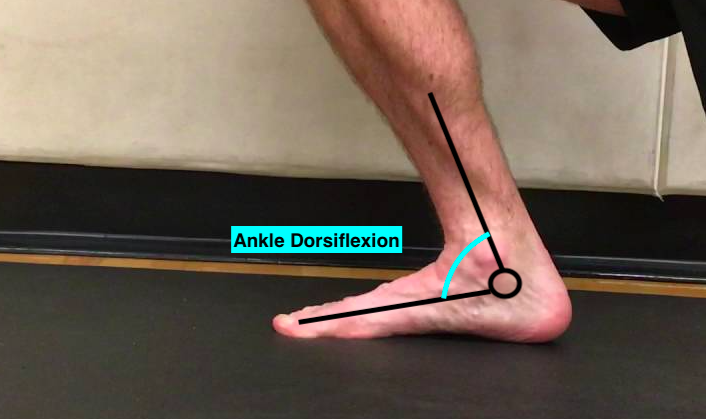
Limited dorsiflexion at the ankle leads to compensation at the midfoot, with it over-rotating inwards to make contact with the ground. The body always finds a way.

This over-rotation places additional stress on the plantar fascia. To minimize that and the tightness I addressed before, there’s two stretches I recommend with the first targeting the gastrocs and second targeting the soleus. Here’s a great video explaining the nuances of both:
Start at 30 seconds for each stretch on each side building your way up to two minutes.
Plantar fascia flexibility
The plantar fascia itself can tighten up on you and cause issues directly. This is often part and parcel along with calf tightness with each pulling on different ends and leading to exponential tightness. To address the plantar fascia, try this stretch from the great resource Physio Tutors:
Like the calf stretch, I’d recommend starting at 30 seconds and building your way up to two minutes. Additionally, this is a great one to do when you wake up to make the plantar fascia a little more pliable and more friendly when you take those first steps.
Big toe (hallux) extension
As I explained in part two, the big toe is critical for foot function and stability because it triggers the “Windlass mechanism” of the foot. When big toe extension is lacking – normal range of motion is roughly 60 degrees – there’s added stress on the plantar fascia. Here are two ways I recommend keeping that big toe extension happy:
For the first mobilization, do it two to three times per day if possible for 30 seconds on each and building up to a minute. For the second mobility drill, start with a smaller ball like a golf ball and then move to a larger ball like the lacrosse ball shown in the video, working your way up from 30 seconds to a minute on each.
Those are the three critical spots for mobility and that brings us to the most important section to alleviate plantar fasciitis, particularly the root cause and tissue level changes…
2 – Strengthening
As I explained in part 1 of this blog series, plantar fasciitis consists of the micro tears at the tissue when the stress placed on the fascia exceeds its capacity to tolerate such stress. To increase that capacity, we have to strengthen the fascia. Additionally, we can take additional stress off the plantar fascia by addressing other key muscle groups to improve bio-mechanics.
Plantar fascia strengthening
To address plantar fascia strength and endurance, start with the first video – a calf raise progression – and then move to the second video – a targeted plantar fascia calf raise:
Foot intrinsic strengthening
The “foot intrinsics” are muscles that do not cross the ankle joint and reside solely in the foot. There are three different layers of foot intrinsics and here’s the first, most superficial layer for your viewing pleasure:

They are key in helping support the foot during movement but often ignored which leads to increased stress to the plantar fascia and all other foot and ankle muscles. Lets break that cycle by building up their strength and endurance. Here’s how:
Start with 1 set x 10 reps and work your way towards 3 sets x 15 reps. Note: Learning this motor pattern and toe control can take some time so don’t be discouraged early on. Also, sorry for having to look at my toes.
Posterior tibialis (post tib) strengthening
The posterior tibialis is a muscle that starts near the backside of the knee and runs down the medial (inner) part of your lower leg, turns into a tendon near the medial malleolus (that inner bony bump at your ankle), and inserts into a bone on the midfoot called the navicular.

It’s arguably the most important muscle of the foot – my favorite personally – and its function is critical to the foot and avoiding plantar fasciitis. That’s because the post tib does two key things:
-
It brings the arch of the foot upwards during supination
-
It eccentrically controls pronation, meaning it helps lower the arch during foot flat
If you’ve google searched “plantar fasciitis” even once, I’m sure you’ve already seen how “flat feet” get a ton of blame. However, none of the evidence bears that out. In fact, stiff supinated (high arched) feet are more likely to have plantar fasciitis than their counterparts. What has been linked to plantar fasciitis is staying in the pronation phase for too long, what I call the “duration of pronation”.
When the foot is in that flat, arches flat position for too long it places extra tension and stress on the plantar fascia. If you harken back to the two key functions of the post tib, it’s the muscle that is directly responsible for controlling that duration. Therefore, we have to make the muscle very strong and very durable. Do these two exercises:
Hip abductors
The hip abductors are muscles that sit on the lateral (outer) part of your hip and are responsible for keeping your femur (thigh bone) out of internal rotation and adduction.
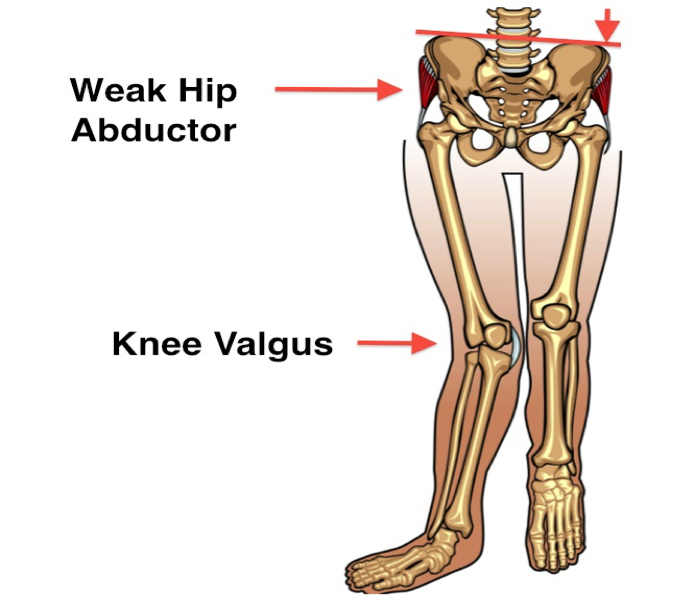
When you see someone whose knees are almost touching while walking – runway models come to mind – they very likely have weak hip abductors. 90% of the people I test for hip abductor strength are lacking. Hip abductor strength influences the foot via the knee. When the femur – the upper bone of the knee – drops inwards, the tibia or shinbone – the lower bone of the knee – rotates inwards. The tibia is also part of the ankle joint so when it rotates inwards, the foot drops into pronation.

That can influence a longer duration of pronation. Do this progression to improve hip abductor strength and improve your bio-mechanics (this may also help clear up knee pain):
Glutes
The gluteal muscles – namely the glute max, specifically the lower fibers of the glute max – are responsible for controlling the lower leg and improving shock absorption as the foot hits the ground, known as “stance phase” of the gait cycle.

As anyone with plantar fasciitis has likely experienced, stepping and walking can be quite painful. Therefore, we can work on glute strength to help dissipate some of that force through the foot. Use this progression (and apologies in advance for the audio hiss, these were my naive filming days):
Mobility and strengthening are the meat and potatoes of treating plantar fasciiits, namely the root causes. However, there are treatments that will help complement them further.
Additional treatment
Balance
Balance is a key part of stability and proper foot mechanics as balance underlies movement and placing the limbs in good positions for the intended movement. If your body can’t recognize where it is in space effectively, it can’t effectively calculate the best movement pattern. Therefore, we have to work on balance.
Try this progression:
Gait re-training
When you have pain with stepping due to plantar fasciitis, it’s natural to change the way you walk. Typically, in my experience, people will start to walk on the outer part of their foot to avoid that medial (inner) pain response. This not only leads to new soreness/discomfort on the outer part of the foot but it further alters which muscles are being used and makes walking less efficient.
Once your plantar fasciitis pain has decreased to the point where you’re not feeling it while stepping, we have to re-train the brain and body to walk “normally” and restore appropriate muscle function and efficiency. The cue I use is “heel to toe”. Step down with the heel, rock over the midfoot, and then push through the forefoot (ball of the foot) in one fluid motion.
Like breaking any habit, going back to the heel-toe pattern will take time and mental effort to remind yourself but gradually it will get easier and easier.
Activity level jumps (“Too much, too soon”)
Activity is great and I personally recommend none of my patients stop being active. However, the key is understanding how much is too much because we don’t want to over-stress that fascia beyond it’s capability. It has to be a step-wise progression and return to activity.
The general rule of thumb for week to week increases in activity is 10%, known as the “10% rule”. The max increase in volume week to week shouldn’t exceed 10%. For example, if you’re walking 5 miles total this week, next week will be 5.5 max, and so on.
I know it seems like such a tiny jump but when dealing with plantar fasciitis, it’s so important to be measured and methodical with your return to activity. The #1 reason I see people re-aggravate their plantar fasciitis is not following this rule, especially as they start to feel better. They see the mountain top and start skipping steps.
Moving around periodically
When the plantar fascia is inactive for long periods of time, it’s typically painful when you go to move around for the first time. That’s why having very painful first steps in the morning or after being seated at the desk working for an extended amount of time is very common.
Two ways to combat this: The first is by setting a timer for each hour which signals you to get up and move around. The second is by moving the foot around while seated. You can use the “toe yoga” that I mentioned above or you can do some seated calf raises….or both!
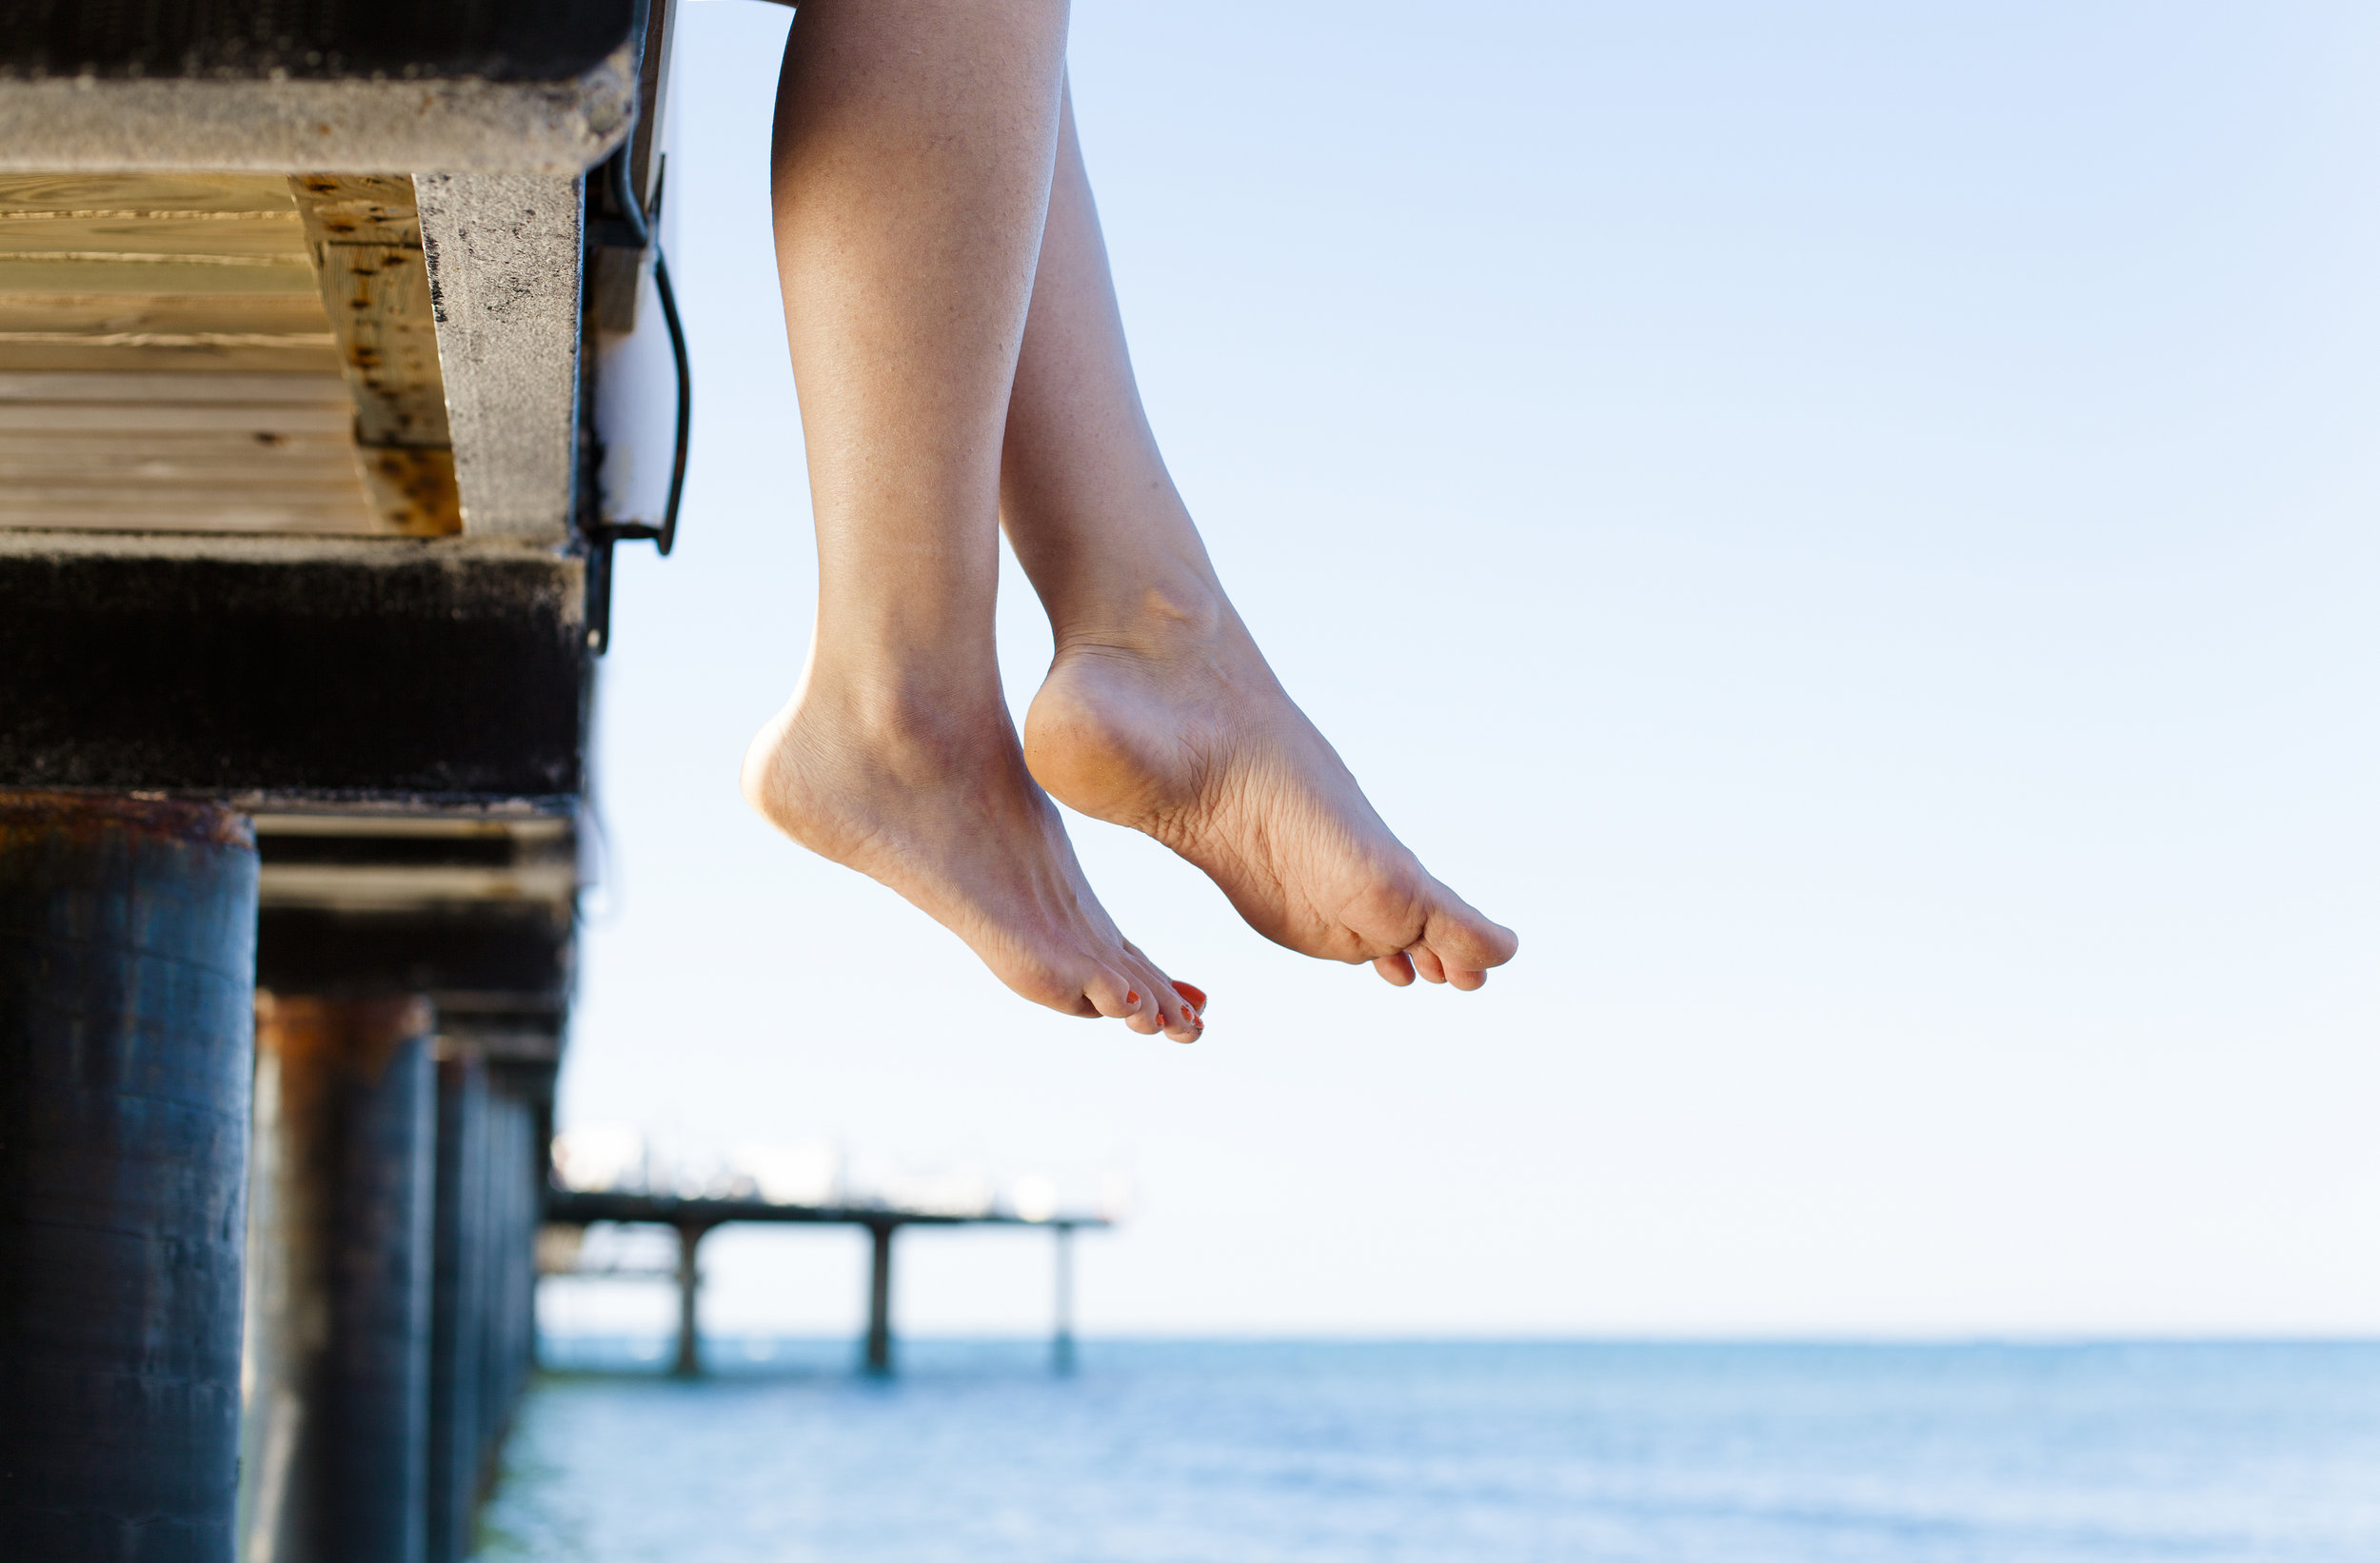
Avoiding extended periods of plantar-flexion
Plantar-flexion is when the foot is pointed downwards, like so:

This position tightens the plantar fascia so when you go to step and the plantar fascia has to stretch out, there’s a pain response. This extended plantar-flexion occurs when you’re sleeping as the foot naturally falls into that position. It also naturally occurs in any position where your feet aren’t hitting the ground like when you have your feet up on a chair or couch or if you’re sitting on a high chair with the feet dangling downwards.
For the first scenario – the night time – there’s actually something called a night splint that straps onto the foot and keeps it out of that position. Although it can be very helpful especially for the morning pain and discomfort, it’s not easy for most people to sleep with. There are many different night splint models out there but I haven’t found any that are comfortable. If the trade-off for a night splint is poor sleep, take it off. Sleep is the foundation of health.
For the second scenario – feet dangling or resting in that position – it’s just something to be cognizant of and avoid.
That brings us to the final treatment technique and certainly not least because it will help address symptoms….
Frozen water bottle
An effective and easy at-home way top reduce plantar fasciitis pain is by freezing a water bottle and rolling it along the bottom (plantar) aspect of the foot. Do it for 10 mins and then take a break for 10 mins, repeating to your heart’s desire.
So that’s all I got for you and it’s a pretty comprehensive list. I incorporate each of these things into any patient I treat for plantar fasciitis and they work very well when done right.
I know seeing a medical provider isn’t always feasible but I do highly recommend seeing a physical therapist if you have plantar fasciitis pain. Further, there’s increasing research that platelet rich plasma (PRP) therapy can be beneficial for treating plantar fasciitis as well, and gives a larger window to get out in front of the injury and really work on the strengthening aspects. Lastly, if none of that works, there are more invasive surgical options where the surgeon will snip a small piece of the calf or plantar fascia to mechanically alleviate the tightness.
Thanks for reading and always remember that health and performance are two sides of the same coin. If you have any questions or concerns, feel free to reach out.